
Last updated
Press M (or the ☰ button bottom-left) to open the menu. It's a row of icon tabs; the active tab shows its name. ◀ ▶ switch tabs, ▲ ▼ move between rows, Enter edits or activates, Esc goes back or closes, so a paired shifter can drive the whole thing. Anything destructive asks you to press again to confirm.
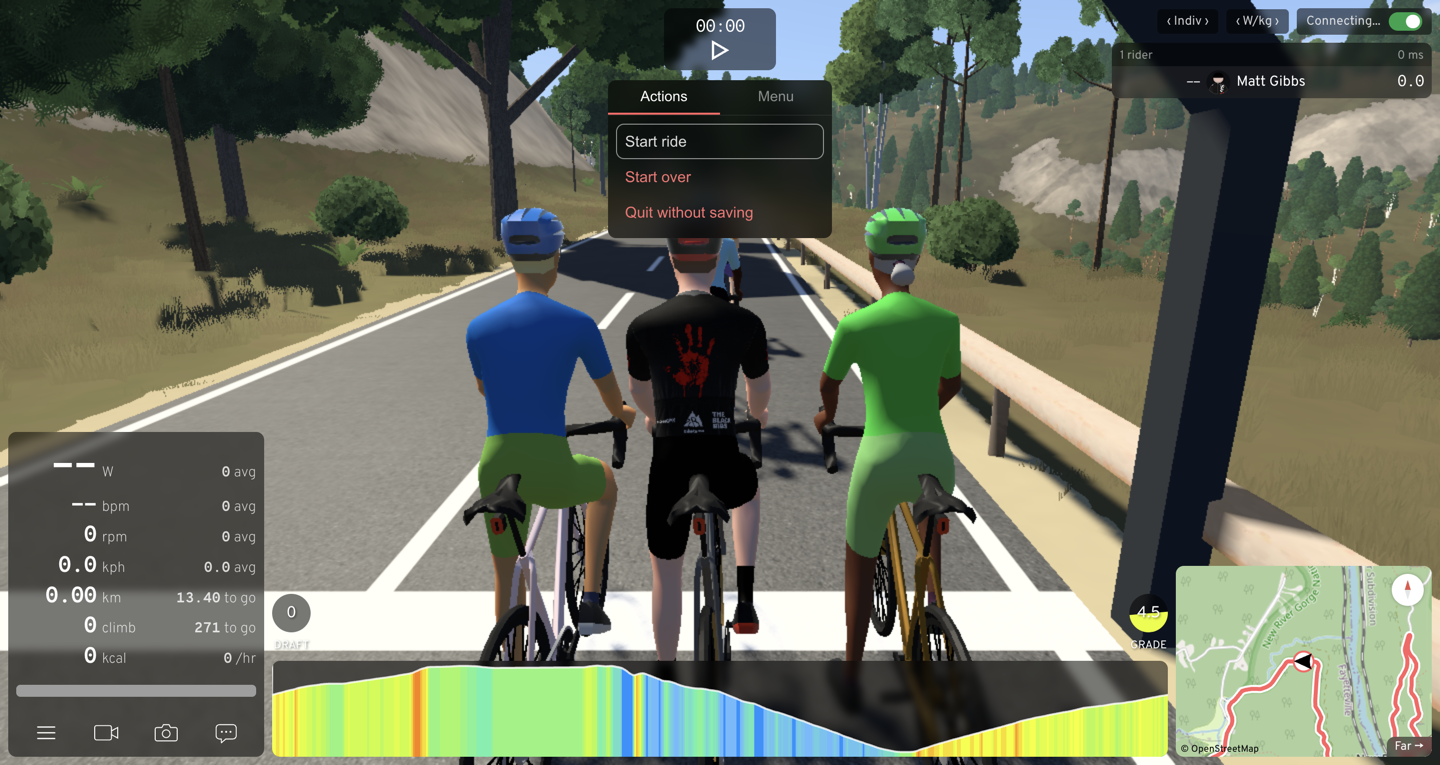
Press P, or tap the clock at the top of the screen, for the ride actions popup: Start ride, Pause / Continue, Save and quit, Start over and Quit without saving. If a power source is paired, the ride starts by itself when you begin pedalling.
Devices
Pair your trainer, sensors and controllers. In a browser, click Pair device… and pick the device in the browser's chooser; the native app scans by itself and lists what it finds with a Connect button.
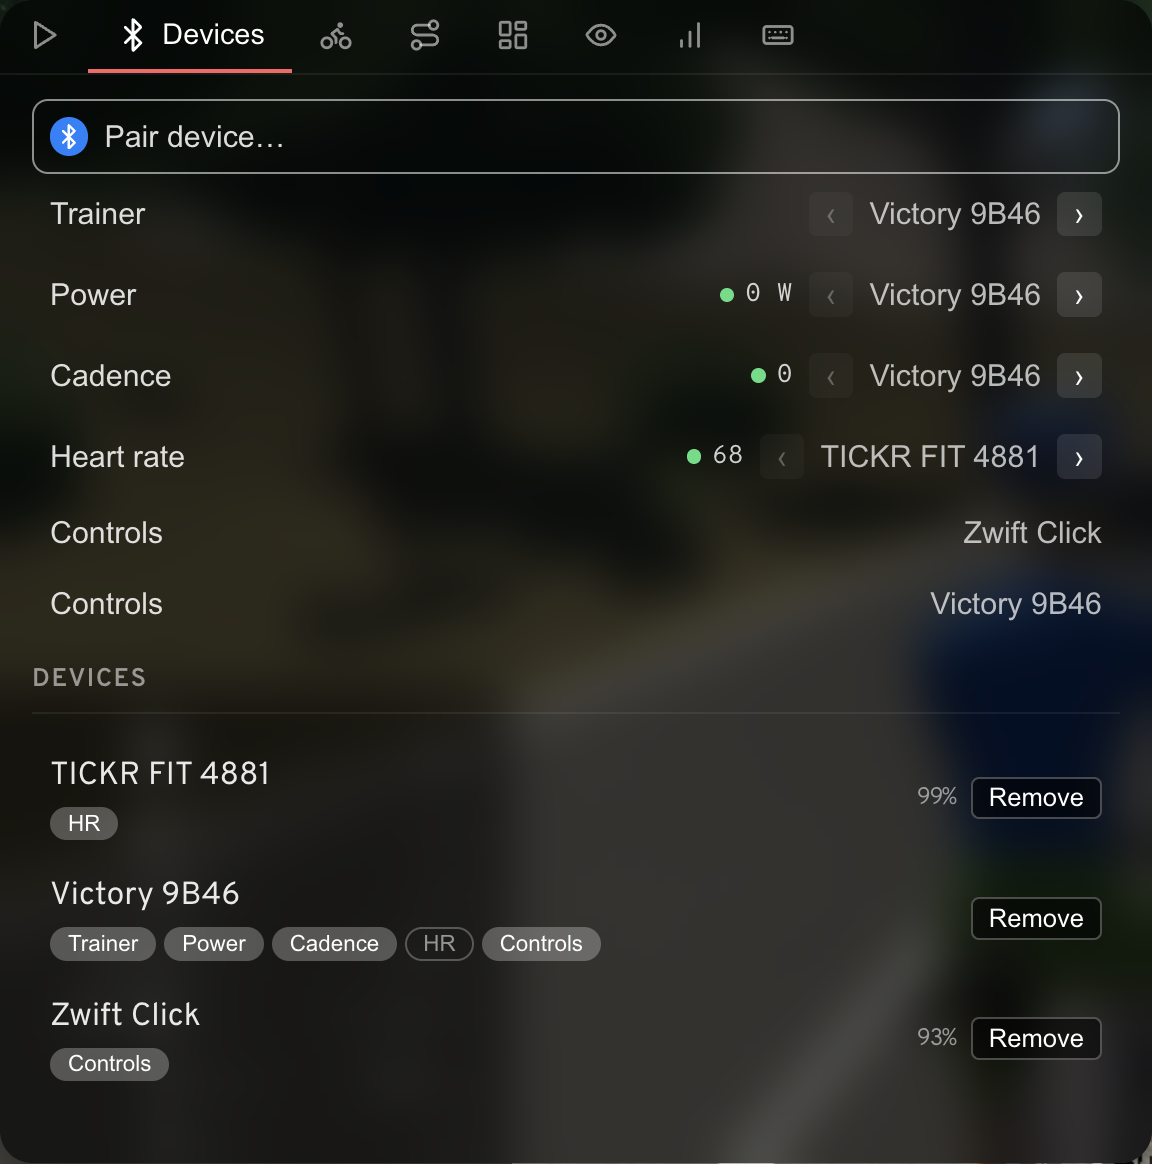
The rows at the top (Trainer, Power, Cadence, Heart rate) show which device feeds each reading, with the live value beside it; use the arrows to switch devices or turn one Off. Each paired device carries chips for what it can supply: a filled chip is the active source. Power match appears at the bottom when two power sources are paired. What pairs, which device wins, and how dropouts are handled is on the Bluetooth devices page.
Ride
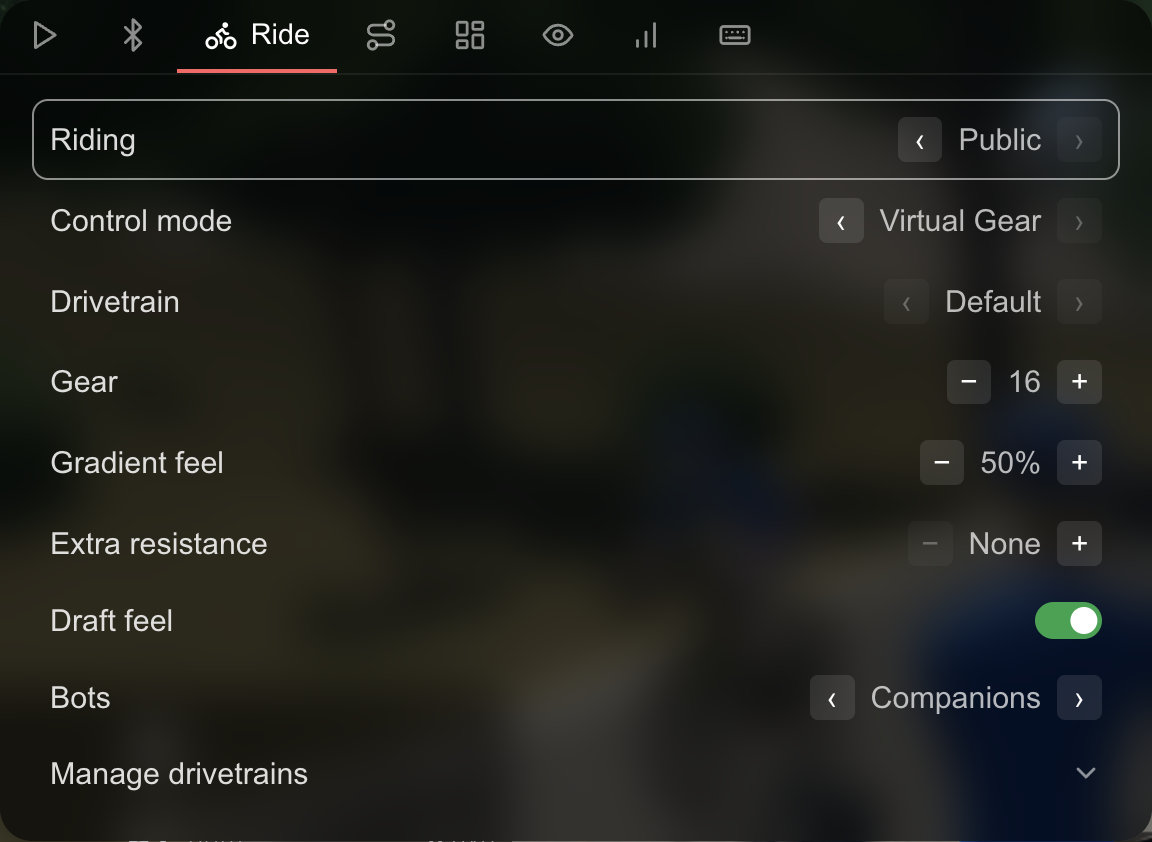
Riding — Solo or Public. Hidden in events. See Riding with others.
Control mode
How your trainer responds to the road. The rows beneath it change with the mode.
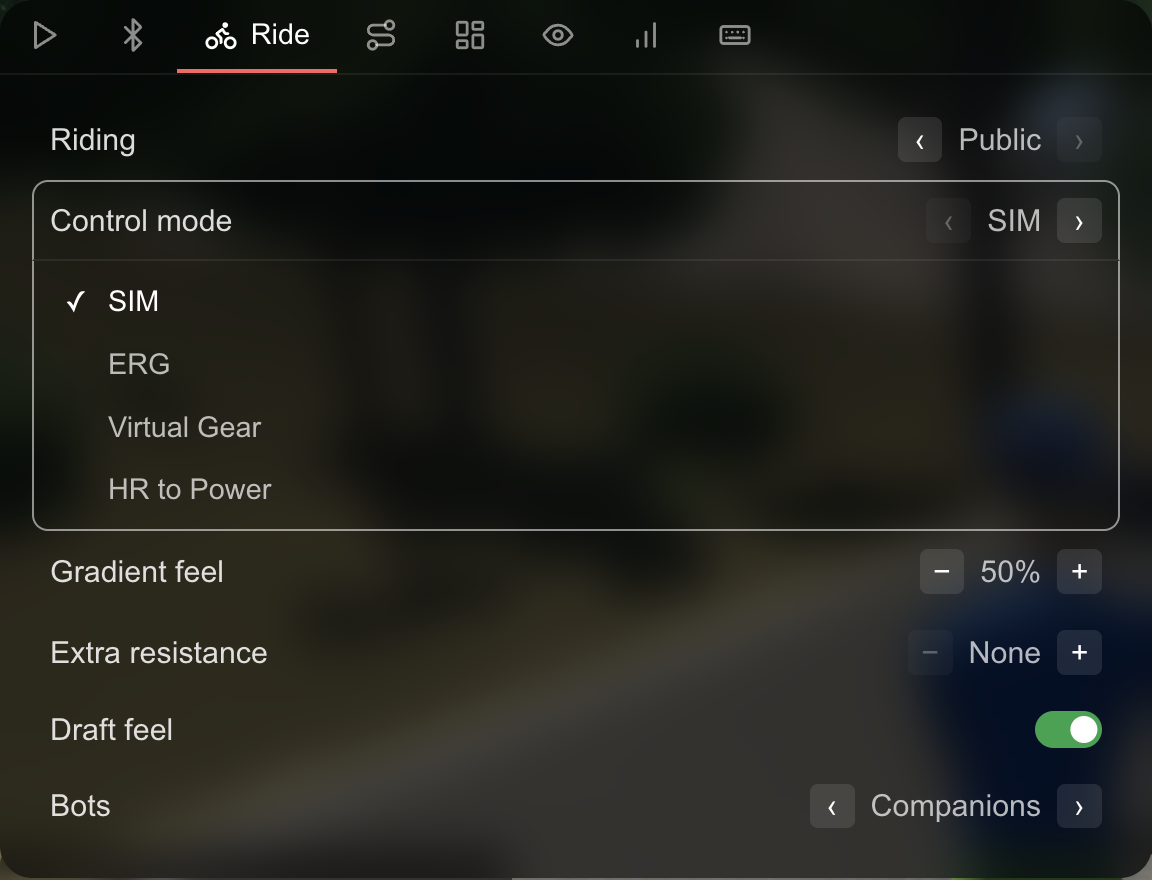
SIM is the default: the trainer reproduces the gradient and you shift your real gears.
- Gradient feel — the share of the gradient the trainer applies, 0 to 100%. At 50%, a 10% climb feels like 5%. Descents are always halved on top of that.
- Extra resistance — a constant 1 to 10% grade added to everything, for setups that feel too easy on the flat.
- Draft feel — on by default, hidden in races. Your trainer's resistance drops by up to half while you sit in a draft, so a wheel really is easier.
ERG holds a power target regardless of gradient or cadence.
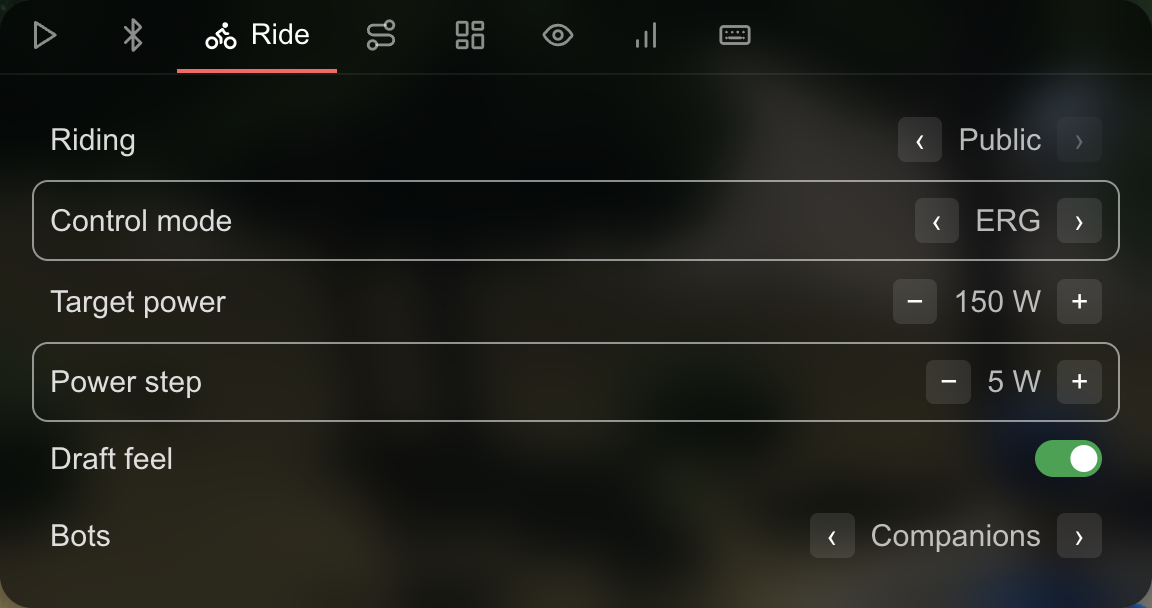
- Target power — the wattage to hold. Shifting (W / S by default) raises or lowers it.
- Power step — how many watts each shift moves the target, 1 to 50 W; the default is 5 W.
- During a workout the target follows the intervals, and shifting moves the workout's Power bias by 1% instead.
- With a trainer and a separate power meter, turn on Power Match so the target is met by your power meter.
Virtual Gear calculates resistance from a virtual drivetrain, the gradient and your cadence, so you leave the chain alone and shift with buttons. Biketerra switches to it by itself when it sees a shifter (Zwift Click, Play or Ride, CYCPLUS BC2, or an OpenBikeControl controller); keyboard riders can pick it and shift with W and S. The current gear shows in the readout at the bottom of the HUD.
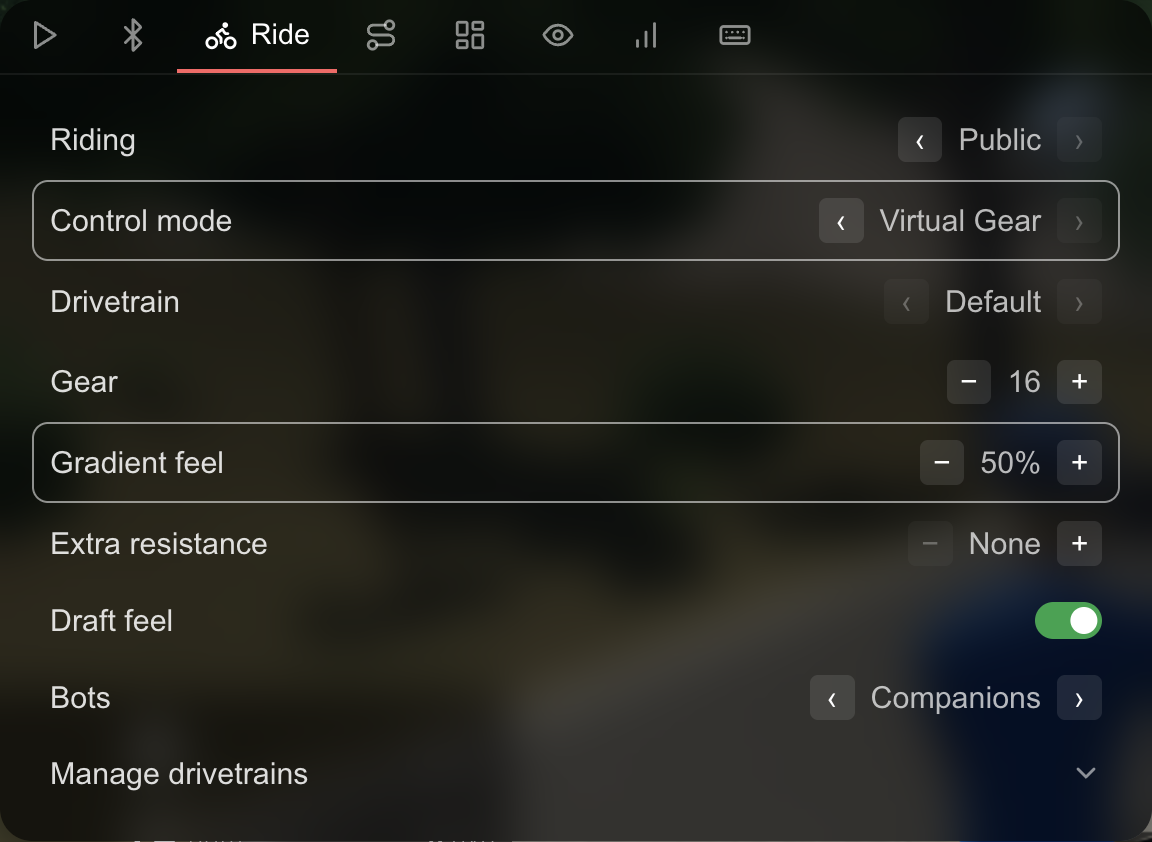
- Drivetrain — the built-in 54/30T with 10-40T, or one of yours. Manage drivetrains adds a custom one: name it, type the spec (
50/34T + 11-32T, 11 speed) and press Convert. See Virtual Shifting for the full guide, supported shifters and trainers. - Gear — the current gear, which you can also set here.
HR to Power estimates power from your heart rate for rides with no power source. It only appears while nothing supplies power, and never in a race. See HR to Power.
Biketerra switches modes automatically to match your devices: no controllable trainer means SIM, a shifter appearing means Virtual Gear, a power source appearing in HR to Power means SIM, and a rower means SIM only. Your choice isn't saved between rides.
Bots
None, Companions, Gran Fondo or Race; a bot race adds Difficulty and Laps rows. See Bots.
Route
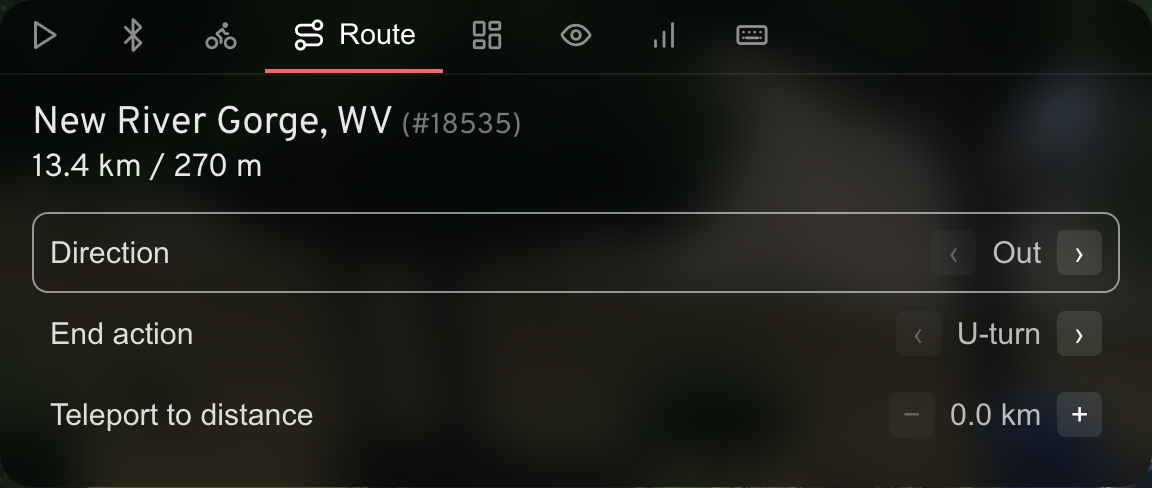
The route's name, number, distance and climb, and on free rides: Direction (Out or Back), End action (U-turn or Teleport back to the start) and Teleport to distance, where you type any point on the route. Hidden in races.
UI
This is where you customise the HUD.
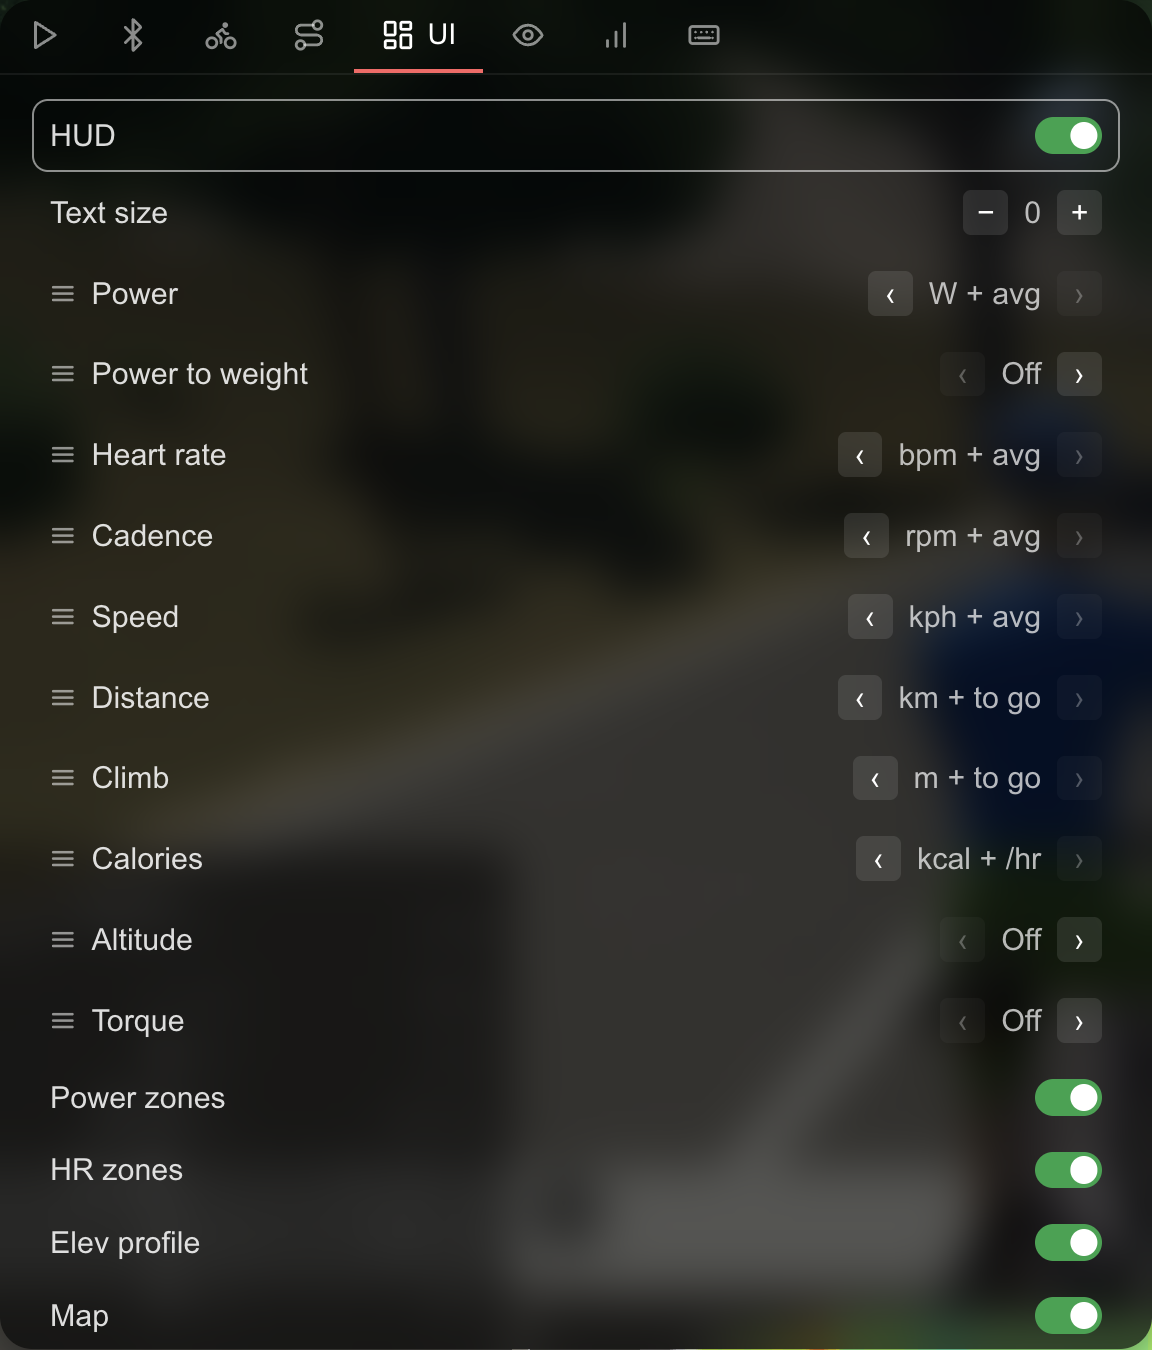
- HUD on or off (also the U key) and Text size from -5 to +5.
- One row per stat. Each cycles through Off, the value, and the value with its companion (average, remaining, or per hour). The first stat in the list is drawn large; drag rows to reorder them. Available: Power, Power to weight, Heart rate, Cadence, Split (rowing), Speed, Distance, Climb, Calories, Altitude, Core temp, Breathing rate, Power balance and Torque. Some only appear with a matching device.
- Widgets: Power zones (needs your FTP), HR zones (needs resting and max HR), Elev profile, Workout list, Workout chart and Map.
- In a room: Chat, Rider list and the stat it shows (W/kg, Watts or Speed).
- Reset layout puts everything back.
Reading the HUD
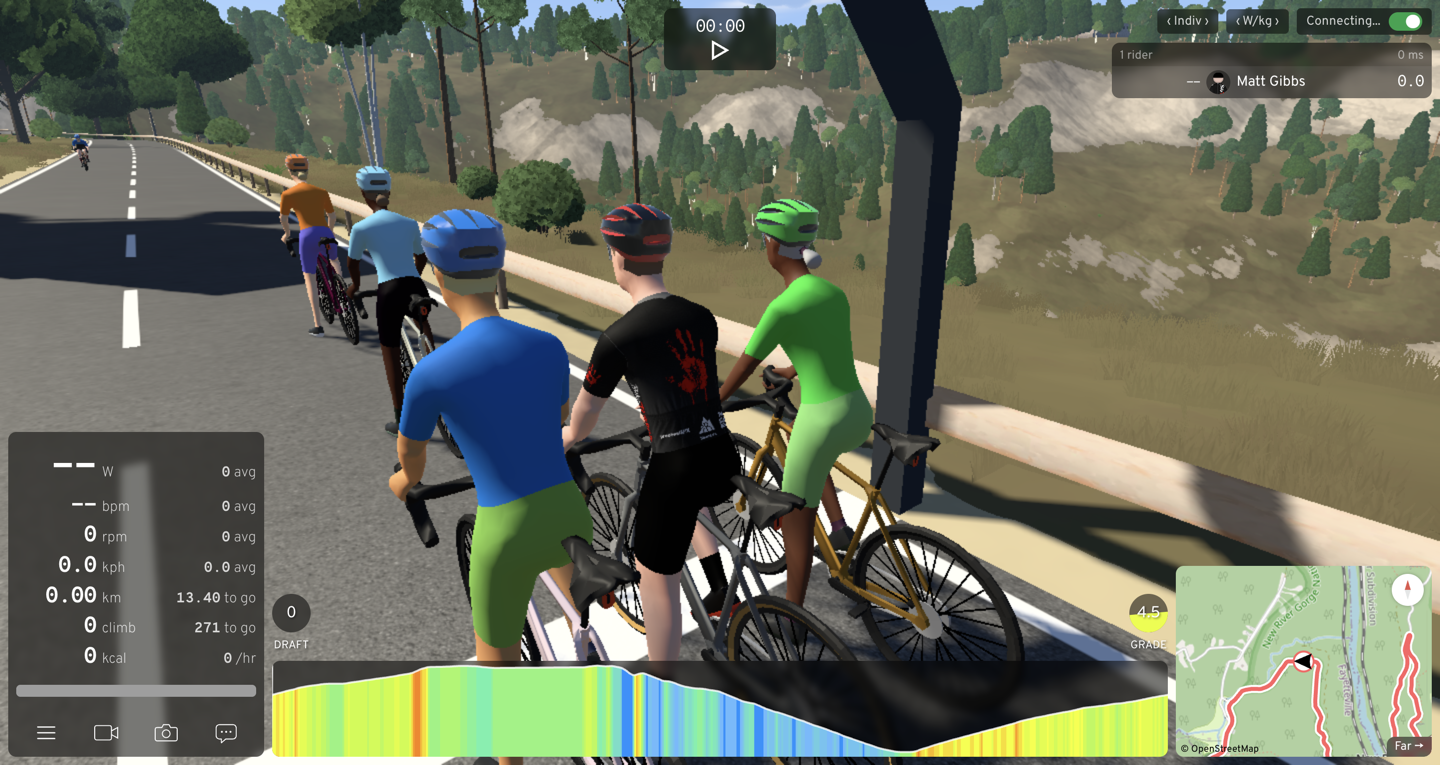
- Top: the ride clock; the rider list controls and the Solo/Public switch on the right.
- Left: the stats panel, with the zone bars beneath it when enabled.
- Bottom-left buttons: menu, camera, screenshot and chat.
- Bottom-centre: the DRAFT gauge, the GRADE gauge, and the readout (gear, ERG target or workout bias, with − and +). Below them the elevation profile, which also shows dots for the groups ahead and behind you.
- Bottom-right: the minimap. Click Far / Near to change its range, or press , to hide it.
- During a workout the interval list sits top-left and the workout chart replaces the profile.
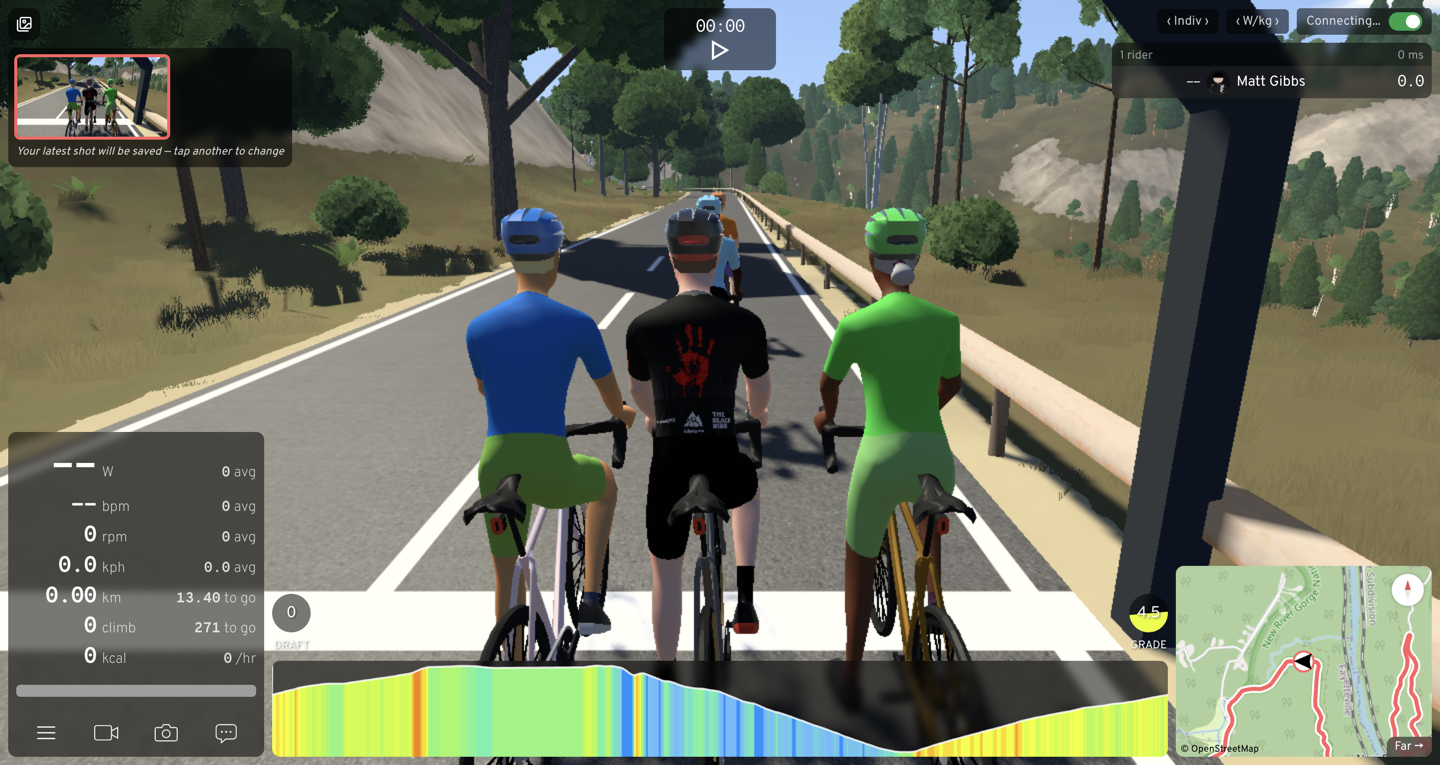
Screenshots: press K or the camera button to capture the 3D view without the HUD. Biketerra keeps the last three in a small reel; the newest is starred and the starred one is saved with your activity as its photo. Tap a tile to star a different one, or tap the starred tile to save no photo. Shots live only until you leave the ride.
Visuals
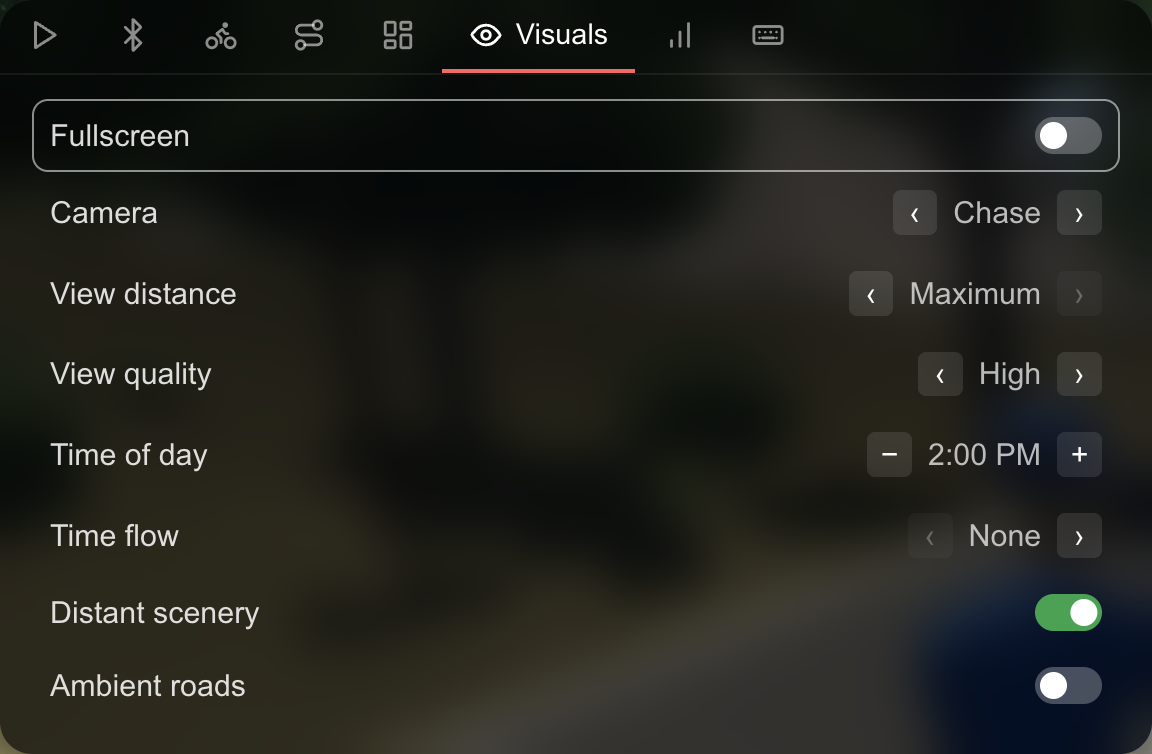
- Camera — POV, Rear view, Orbit, Chase, Chase far or Sky. C cycles them, B looks behind, the mouse wheel zooms between POV and Chase. Your choice is remembered.
- View distance — how far the world is built: Minimum to Maximum. Higher tiers load more terrain and far more distant trees. High and Maximum are for subscribers; free accounts ride at up to Medium.
- View quality — how much detail is drawn close up. Low has no grass and soft shadows; Medium adds grass; High adds dense grass and sharper tree textures; Maximum adds 4x anti-aliasing. Changes apply instantly and the setting is open to everyone.
- Time of day — moves the sun and moon in half-hour steps. Time flow makes the clock run; at 24x a day passes in an hour of riding.
- Distant scenery — the far terrain out to the horizon. Ambient roads — the surrounding road network, not just your route; turning it on rebuilds the scene.
If it lags
- Turn on hardware acceleration. In Chrome, open
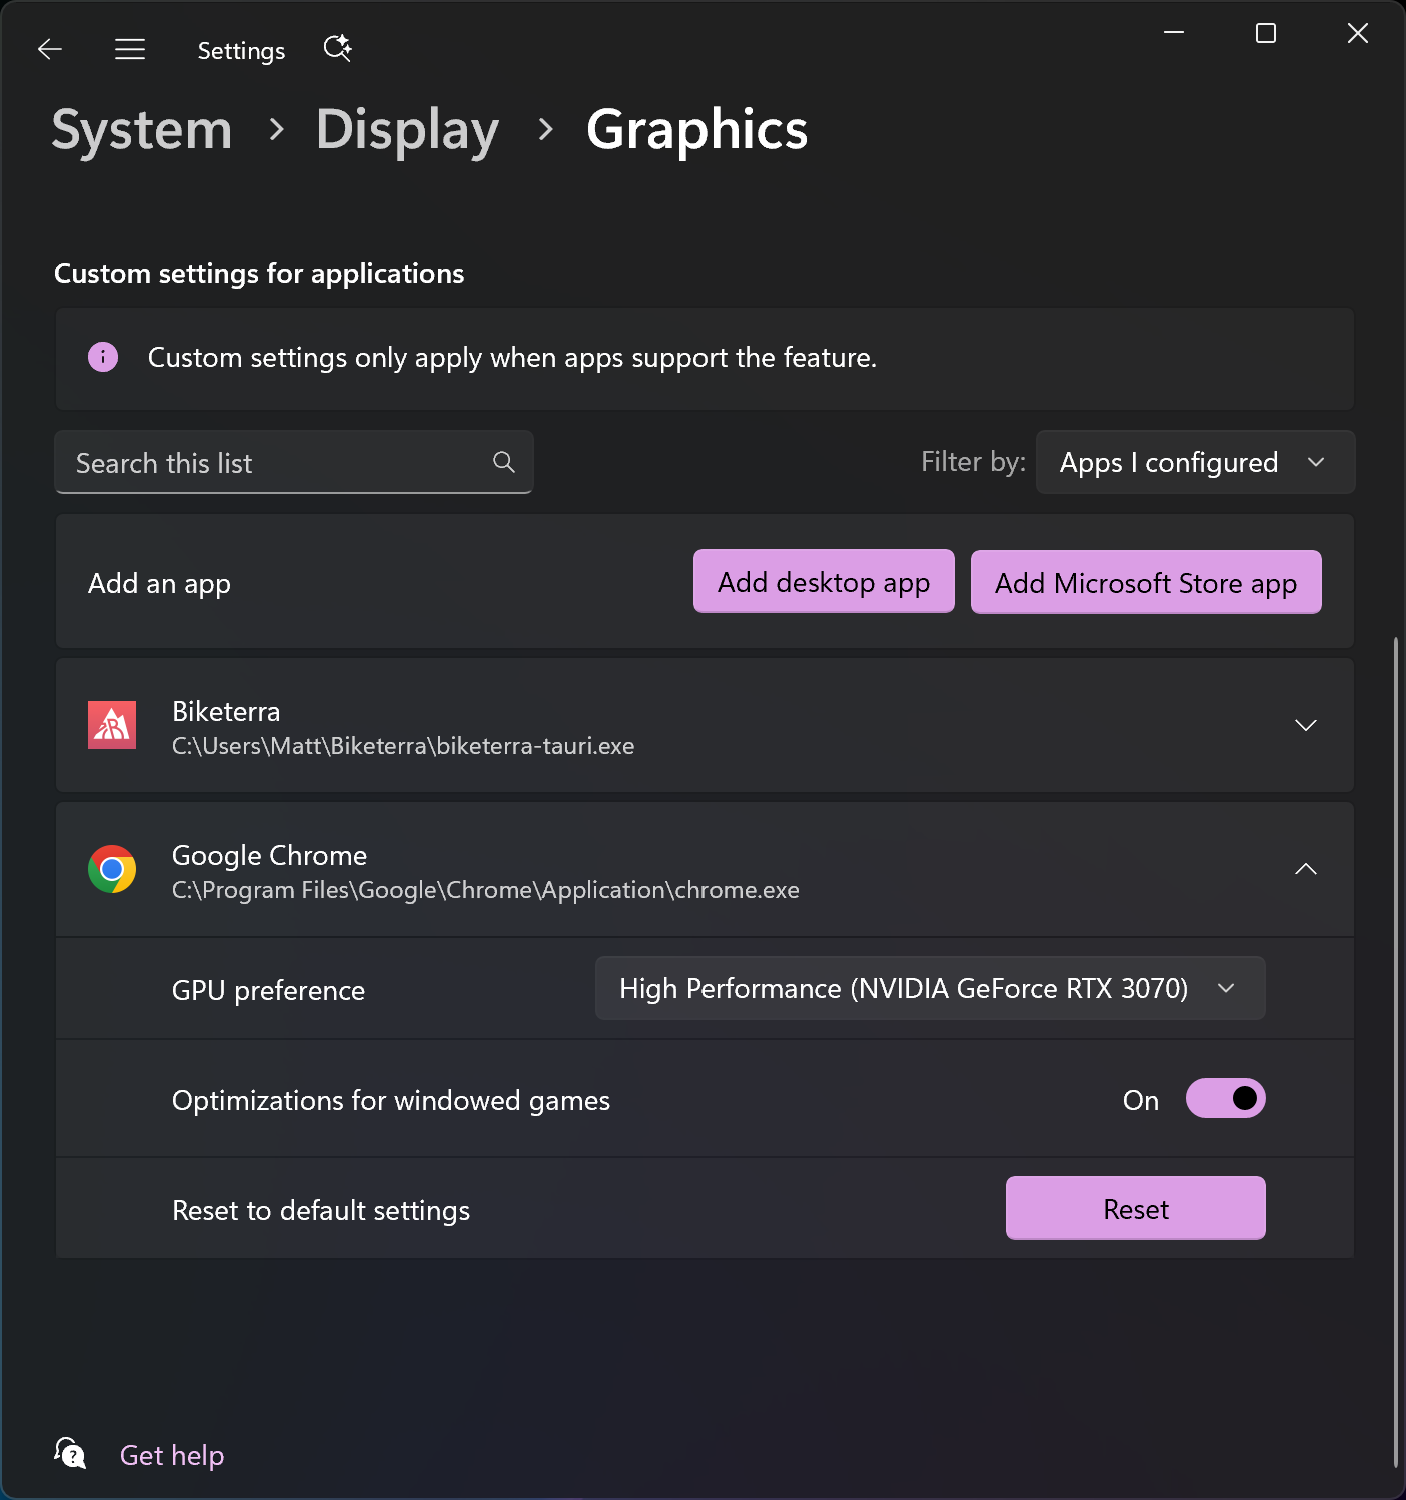
chrome://settings/systemand enable Use graphics acceleration when available. If the frame rate drops below 8 frames per second, Biketerra pauses the ride and reminds you. - On a Windows laptop, add Chrome (or the Biketerra app) as a High performance app in Windows' Graphics settings so it uses the discrete GPU.
- Lower View quality, then View distance. Quality is the bigger lever.
- Use fewer bots: Gran Fondo and Race fields put many riders on screen.
- Close other tabs, especially video.
If the GPU runs out of memory, Biketerra lowers the quality one step on its own and says so in a toast. After three failed recoveries it asks you to lower the settings and press Retry.
Biketerra renders with WebGPU where the browser supports it (current Chrome, Edge, Brave and the native apps) and falls back to WebGL otherwise. Add ?renderer=webgl to the ride URL to force the older renderer for comparison.
Workout
Load a workout from the preloaded library, a .ZWO file, or your TrainerDay, Intervals.icu or Athletica calendar, and control it once it's running. See Workouts.
Results
Appears in races, and in bot races once the gun has gone: the live order.
Hotkeys
Every keyboard and controller binding, with a Send debug log button at the top. If something goes wrong mid-ride, press it and paste the link it returns into Discord or an email. Left Shift + Z toggles a debug overlay with the frame rate, GPU memory and scene counts, which helps when reporting a problem.
These are the defaults.
| Riding | Key | Controllers |
|---|---|---|
| Shift up / more resistance | W | Zwift Click, Play, Ride and KICKR BIKE +, CYCPLUS BC2 +, OpenBikeControl shift up |
| Shift down / less resistance | S | the same devices, − |
| Steer left / right | ← → | Zwift Click v2 left/right, Play and Ride paddles, OpenBikeControl, MUOV, Elite Sterzo |
| Accelerate | ↑ | Zwift Click v2, Play, Ride up |
| Brake | ↓ | Zwift Click v2 down, Play and Ride paddles, OpenBikeControl brake |
| Camera and screen | Key |
|---|---|
| Look behind (hold) | B |
| Cycle camera | C |
| Toggle HUD | U |
| Toggle ride actions | P |
| Toggle menu | M |
| Toggle minimap | , |
| Toggle chat | T |
| Toggle fullscreen | F |
| Take screenshot | K |
| Toggle Solo / Public, elevation zoom, minimap range | unassigned; bind them if you want them |
| Workouts | Key |
|---|---|
| Start / Pause | Right Shift + Space |
| Skip interval | Right Shift + N |
| Reset | Right Shift + R |
| End workout | Right Shift + Esc |
With the menu open, ↑ ↓ move between rows, ← → switch tabs, Enter selects and Esc goes back. Shifters and steering buttons do the same, so a shifter-only remote is enough. Hotkeys are ignored while you're typing in chat.
Rebinding
If more than one device has sent input this ride, a tab per device appears at the top of the list: Keyboard, Zwift Click, OpenBikeControl and so on.
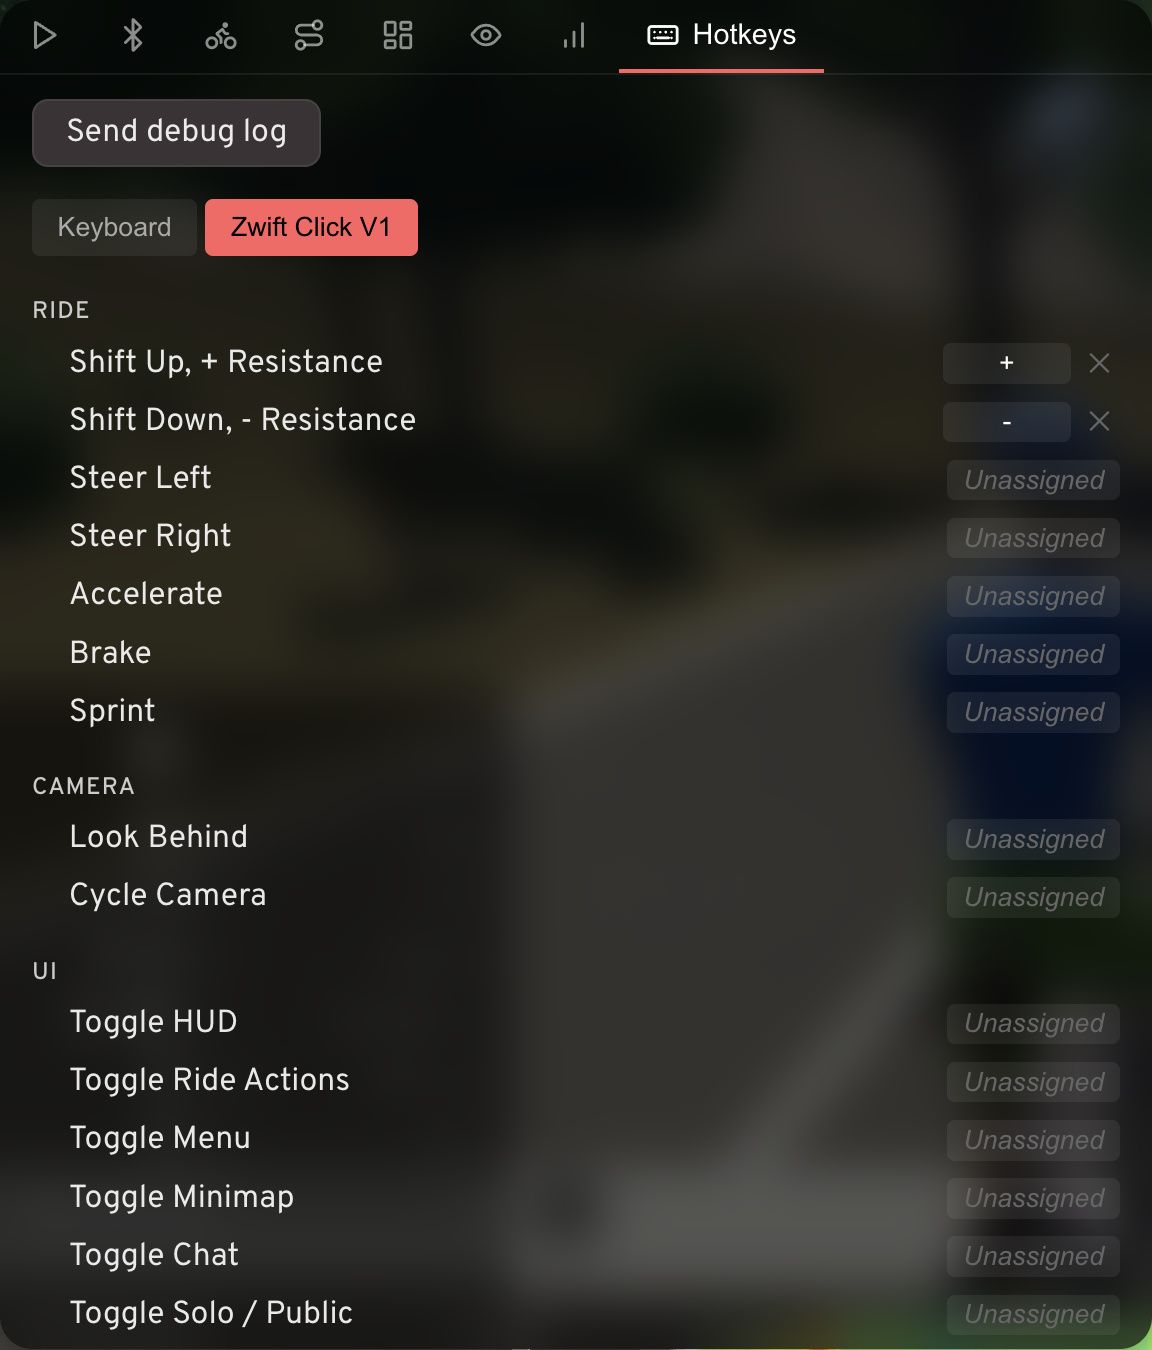
- Click the key shown beside an action.
- Press the new key or button. For keyboard bindings, any modifier you hold is saved with it. Controllers can only bind a button press, not a paddle or lever position.
- Esc cancels.
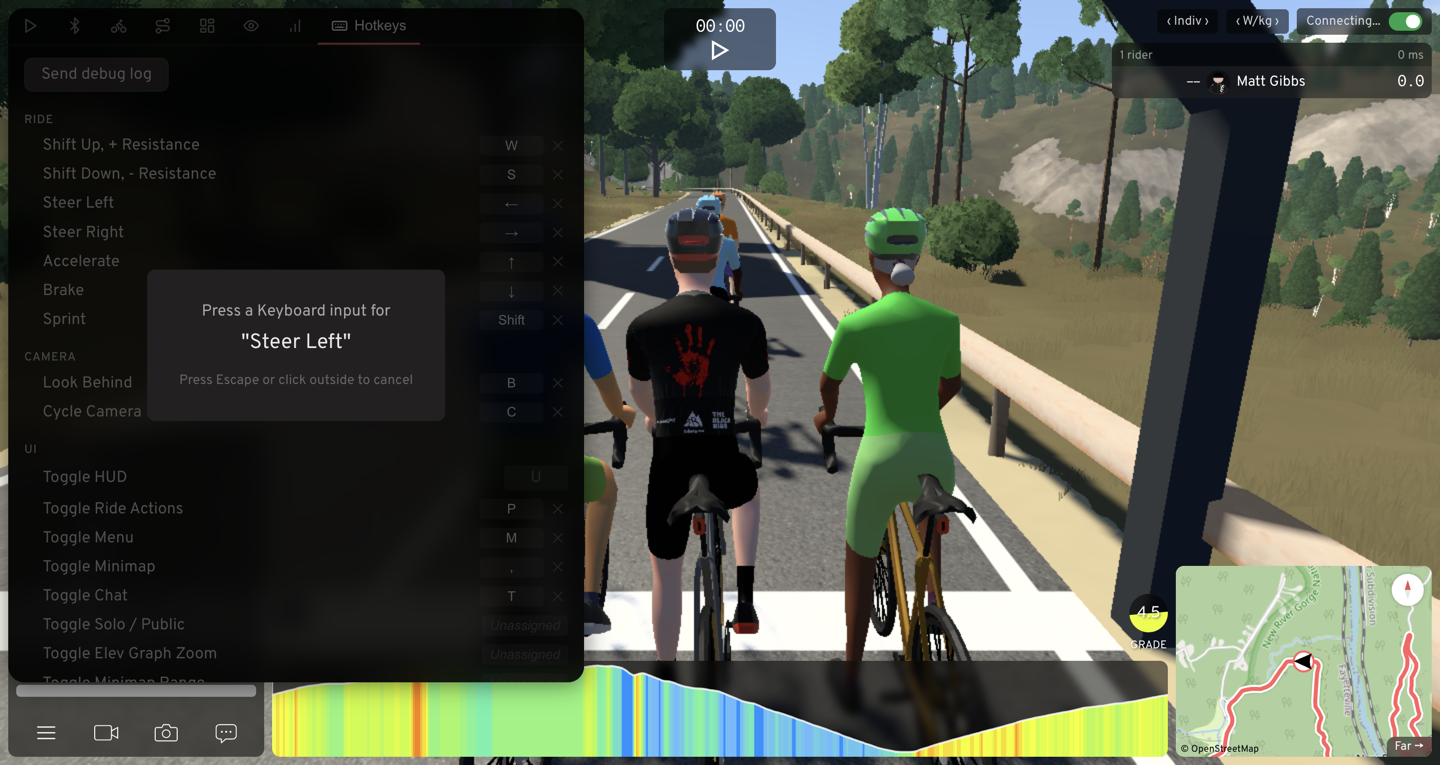
If the input was already used by another action, that action is unassigned. ✕ unassigns a binding, ↺ beside a changed row restores its default, and All ↺ restores every binding for that device. Greyed-out rows (Toggle HUD, menu navigation, analog paddles) can't be changed. Bindings are saved in the browser you're using; they carry over between rides on that device but don't sync elsewhere.